Wednesday, October 14, 2015

How To Change Default Data File (.OST) Location in Office 2013


To set the default location of an outlook data file you have to make a registry change.  Once you make the change, anytime you create a new data file, Outlook will put the data file in that new location. 
These instructions will work in prior versions of office as well but the path to the office key will be slightly different.

Change Default Data File Location in Outlook

1) Start - Regedit - Double-Click Regedit - Accept the Elevation Prompt - Drill Down / Navigate To: Computer\HKEY_CURRENT_USER\Software\Microsoft\Office\15.0\Outlook
image
2) Right-Click Outlook Select New then String Value
3) Type “ForceOSTPath” without the quotes for the variable name and press Enter then Double-Click ForceOSTPath to Edit the string
4) Type the location you want your data files to use.  In my case it was D:\_Profile\Mail
5) Click OK {You can close Registry Editor now}   You will need to close Outlook in order for Outlook to use this new setting.  Now when you create a new OST data file Outlook will put it in the new location. Close Outlook and move any .PST files to the new location if you like.  

Move your OST to the new location…

Unfortunately to use the new location for your existing accounts, you will need to create a new profile.  When a profile is created, it saves the default location :(  To utilize the new location for the OST’s you need to let outlook recreate them.
6) Start - Control Panel - View By small Icons/ - Mail  (on Windows 8 you can also get there by just clicking Start - Type Mail - Click Settings - Click Mail)
image
This screenshot is Windows 8 but Windows 7 will be very similar  Now we will create a new profile and let the OST be rebuilt.
7) Click Add, Type in the Name you would like to give the profile (in my case I used “Dan Stolts”) then click OK
image
This will start the Auto account Setup wizard
8) Setup your first email account (Exchange or ActiveSync) by filling out your name, email address and password.
SNAGHTML1eb57704
The account setup should be fully automated.
SNAGHTML1eb6f94d
Notice if you like you can change the account settings or add another account from the wizard.  just click Finish to complete this account setup.
9) We need to set the new profile to be the default.   Do this by clicking the dropdown for “Always use this profile” and select the one we just created.
10) Cleanup - you can now delete the old profile if you like.  Deleting the profile will not remove the data files.  You will have to go back and do that manually.  By default the old data files were at %USERPROFILE%\Local Settings\Application Data\Microsoft\Outlook (in my case that was: C:\Users\dstolts\Local Settings\Application Data\Microsoft\Outlook)
If you want to see the change you can drill down to the outlook data file settings from the mail control panel app Profile - Properties - Data files - Settings - Outlook Data File Settings
image
You can also get the information from the Account settings screen.  Profile - Properties - Email AccountsE-Mail Tab- Click the account and the location of the data file will be listed.
image
You can now go ahead and create additional accounts if needed.
If you want to copy the old OST file you can copy it to the new location as long as it is not in use.  If it is in use, try closing any apps that might have it open.  If that fails try restarting your computer and not running outlook until after you create the new profile.  I have not personally tried this so let me know if you have success. This may save you some time downloading a large mailbox.
Tip: If you find the OST is still put in the %USERPROFILE%\Local Settings\Application Data\Microsoft\Outlook folder it is likely because there is already an .OST file of the same name in the destination folder. Try moving it somewhere else.  You can try copying it back once the account is successfully setup.

Saturday, October 10, 2015

How to boot into BOSS from the Grub Rescue prompt?

This guide will detail how to boot from the "grub rescue>" prompt for grub2 users.
Boot Procedure:
1. Locate the BOSS partition and the folder containing the Grub modules.
The Grub folder containing the modules must be located so the correct modules can be loaded. This folder was created during BOSS installation and should be located in the BOSS partition. This folder would be located at either (hdX,Y)/boot/grub or (hdX,Y)/usr/lib/grub/i386-pc.
Commands:
ls                               # List the known drives (hdX) and partitions  (hdX,Y).

ls (hdX,Y)/                      # List the contents of the partition's root.

ls (hdX,Y)/boot/grub             # Normal location of the Grub 2 modules.

ls (hdX,Y)/usr/lib/grub/i386-pc  # Alternate location of the Grub 2 modules.

2. Load the modules
commands:
set prefix=(hdX,Y)/boot/grub
insmod linux
eg:
 set prefix=(hd0,1)/boot/grub 
 insmod linux
3. Load the Linux kernel and initrd image using the following commands.
 set root=(hd0,1)
 linux /boot/vmlinuz-2.6.32-5-686 root=/dev/sda1
 initrd /boot/initrd.img-2.6.32-5-686
 boot

Monday, August 31, 2015

Install APC (Alternative PHP Cache) in RHEL/CentOS 6/5 & Fedora 20-12

http://www.tecmint.com/install-apc-alternative-php-cache-in-rhel-centos-fedora/

APC (Alternate PHP Cache) is an free and open source cache for PHP code. The main goal of this module is to provide robust framework for caching and optimizing PHP code.
Install PHP APC in Linux
Install and Enable PHP APC in Linux
The instructions provided here shows how to install and enable APC caching for PHP on RHEL 6.5/6.4/6.3/6.2/6.1/6/5.8/5.6CentOS 6.5/6.4/6.3/6.2/6.1/6/5.8/5.6 and Fedora 20,19,18,17,16,15,14,13,12using PECL command to download from the repositories.

Install Dependency Packages for APC

First, we need to install required packages called peclphpize and apxs commands, to install APC using YUMpackage manager tool.
yum install php-pear php-devel httpd-devel pcre-devel gcc make

Install APC Using PECL

Now we have all the needed packages to install APC. Here we use PECL command to install it. Please select default settings when asked.
pecl install apc
Sample Output :
WARNING: channel "pecl.php.net" has updated its protocols, use "pecl channel-update pecl.php.net" to update
downloading APC-3.1.9.tgz ...
Starting to download APC-3.1.9.tgz (155,540 bytes)
.................................done: 155,540 bytes
54 source files, building
running: phpize
Configuring for:
PHP Api Version:         20090626
Zend Module Api No:      20090626
Zend Extension Api No:   220090626
config.m4:180: warning: AC_CACHE_VAL(PHP_APC_GCC_ATOMICS, ...): suspicious cache-id, must contain _cv_ to be cached
../../lib/autoconf/general.m4:1974: AC_CACHE_VAL is expanded from...
../../lib/autoconf/general.m4:1994: AC_CACHE_CHECK is expanded from...
config.m4:180: the top level
config.m4:180: warning: AC_CACHE_VAL(PHP_APC_GCC_ATOMICS, ...): suspicious cache-id, must contain _cv_ to be cached
../../lib/autoconf/general.m4:1974: AC_CACHE_VAL is expanded from...
../../lib/autoconf/general.m4:1994: AC_CACHE_CHECK is expanded from...
config.m4:180: the top level
Enable internal debugging in APC [no] :
Enable per request file info about files used from the APC cache [no] :
Enable spin locks (EXPERIMENTAL) [no] :
Enable memory protection (EXPERIMENTAL) [no] :
Enable pthread mutexes (default) [yes] :
Enable pthread read/write locks (EXPERIMENTAL) [no] :

Enable APC PHP Extension

Run the following command to enable APC extension in Apache configuration.
echo "extension=apc.so" > /etc/php.d/apc.ini

Restart Apache Service for APC

Restart the Apache service to take new changes.
service httpd restart
OR
/etc/init.d/httpd restart

Verify APC Installation

Create a file phpinfo.php in Apache web root directory. For example /var/www/html/phpinfo.php.
# vi /var/www/html/phpinfo.php
Add the following code to it. save and close.

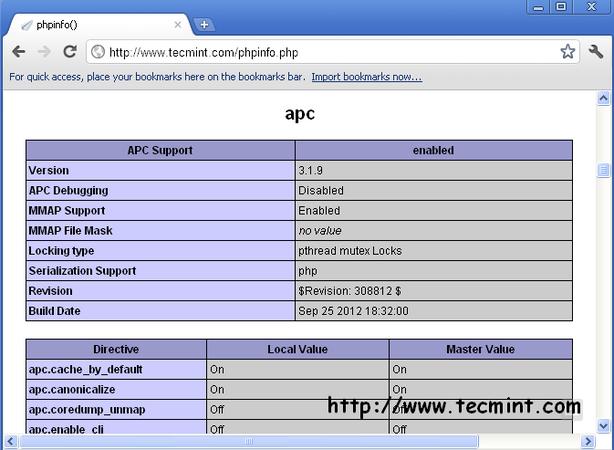
Open any browser and type the following URL. You will see APC enabled configuration similar to below.
http://localhost/phpinfo.php
PHP APC Extension
PHP APC Configuration Screen

Enable PHP APC administration

To enable APC administration panel, copy the following file.
cp /usr/share/pear/apc.php /var/www/html/
Now open the file apc.php with VI editor.
# vi /var/www/html/apc.php
Now set the username and password in the file apc.php as shown below.
defaults('ADMIN_USERNAME','apc');       // Admin Username
defaults('ADMIN_PASSWORD','Set-Password-Here');  // Admin Password - CHANGE THIS TO ENABLE!!!
Type the following URL in the browser. You will get administration panel of APC.
http://localhost/apc.php
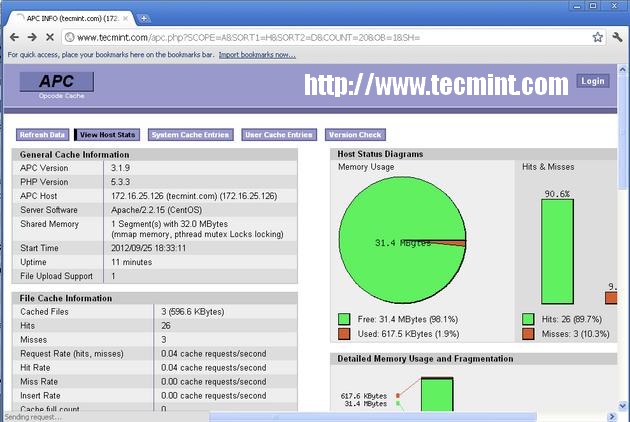
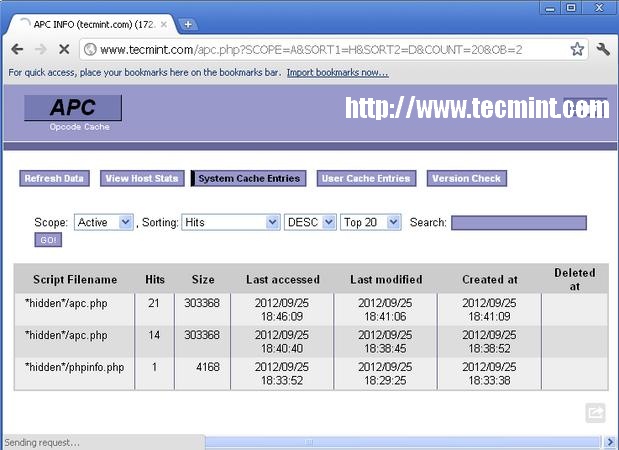
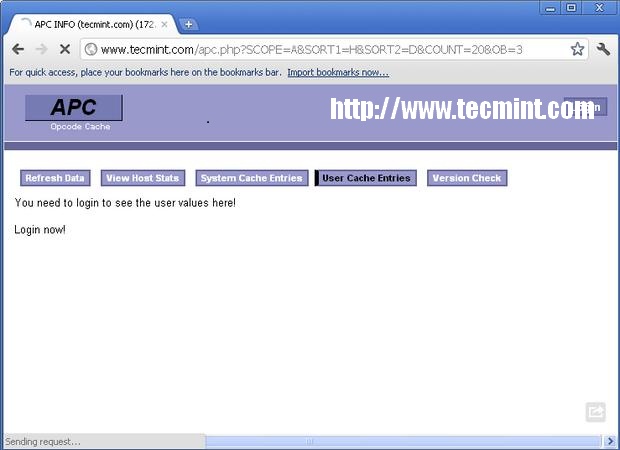
Some screenshots of APC Administration panel for your reference.
Vies Host Stats
APC View Host Stats
APC View Host Stats Overview
System Cache Entries
APC System Cache Entries
APC System Cache Entries Overview
User Cache Entries
APC User Cache Entries
APC User Cache Entries Overview
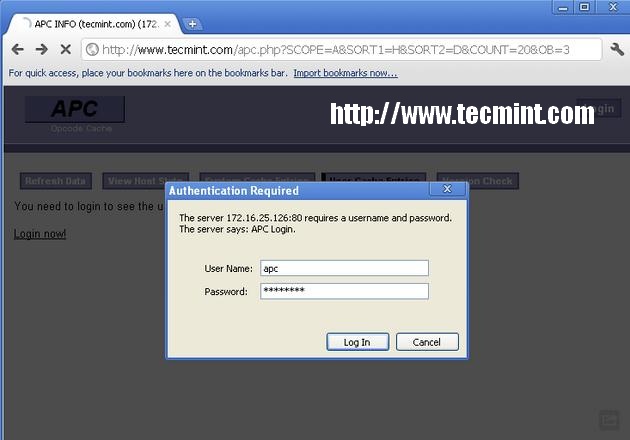
APC Login Screen
APC Admin Login
APC Admin Login Screen
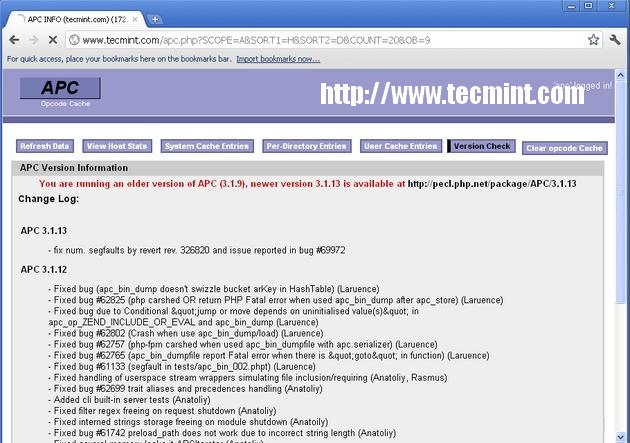
APC Version Check
APC Version Check
APC Version Check Overview

Upgrade APC using PECL

To upgrade, just execute following command it will download and upgrade APC.
pecl upgrade apc

Uninstall APC using PECL

If you like to remove it, then simple type the following command to uninstall APC completely from the system.
pecl uninstall apc

Setting Up High-Performance ‘HHVM’ and Nginx/Apache with MariaDB on Debian/Ubuntu

http://www.tecmint.com/install-hhvm-and-nginx-apache-with-mariadb-on-debian-ubuntu

HHVM stands for HipHop Virtual Machine, is an open source virtual machine created for running Hack (it’s a programming language for HHVM) and PHP written applications. HHVM uses a last minute compilation path to achieve remarkable performance while keeping the flexibility that PHP programmers are addicted to. Till date, HHVM has achieved over a 9x increase in http request throughput and more than 5x cut in memory utilization (when running on low system memory) for Facebook compared with the PHP engine + APC (Alternative PHP Cache).
HHVM can also be used along with a FastCGI-based web-server like Nginx or Apache.
Install HHVM, Nginx and Apache with MariaDB
In this tutorial we shall look at steps for setting up Nginx/Apache web server, MariaDB database server andHHVM. For this setup, we will use Ubuntu 15.04 (64-bit) as HHVM runs on 64-bit system only, although Debian and Linux Mint distributions are also supported.

Step 1: Installing Nginx and Apache Web Server

1. First do a system upgrade to update repository list with the help of following commands.
# apt-get update && apt-get upgrade
System Upgrade
System Upgrade
2. As I said HHVM can be used with both Nginx and Apache web server. So, it’s your choice which web server you will going to use, but here we will show you both web servers installation and how to use them with HHVM.

Installing Nginx

In this step, we will install Nginx/Apache web server from the packages repository using following command.
# apt-get install nginx
Install Nginx Web Server

Installing Apache

# apt-get install apache2
Install Apache Web Server
At this point, you should be able to navigate to following URL and you will able to see Nginx or Apache default page.
http://localhost
OR
http://IP-Address
Nginx Default Page
Nginx Welcome Page
Nginx Welcome Page
Apache Default Page
Apache Default Page
Apache Default Page

Step 2: Install and Configure MariaDB

3. In this step, we will install MariaDB, as it providers better performance as compared to MySQL.
# apt-get install mariadb-client mariadb-server
Install MariaDB Database
4. After MariaDB successful installation, you can start MariaDB and set root password to secure the database:
# systemctl start mysql
# mysql_secure_installation
Answer the following questions by typing y or n and press enter. Make sure you read the instructions carefully before answering the questions.
Enter current password for root (enter for none) = press enter
Set root password? [Y/n] = y
Remove anonymous users[y/n] = y
Disallow root login remotely[y/n] = y
Remove test database and access to it [y/n] = y
Reload privileges tables now[y/n] = y 
5. After setting root password for MariaDB, you can connect to MariaDB prompt with the new root password.
# mysql -u root -p

Step 3: Installation of HHVM

6. At this stage we shall install and configure HHVM. You need to add the HHVM repository to yoursources.list file and then you have to update your repository list using following series of commands.
# wget -O - http://dl.hhvm.com/conf/hhvm.gpg.key | apt-key add -
# echo deb http://dl.hhvm.com/ubuntu DISTRIBUTION_VERSION main | sudo tee /etc/apt/sources.list.d/hhvm.list
# apt-get update
Important: Don’t forget to replace DISTRIBUTION_VERSION with your Ubuntu distribution version (i.e. lucid, precise, or trusty.) and also on Debian replace with jessie or wheezy. On Linux Mint installation instructions are same, but petra is the only currently supported distribution.
After adding HHVM repository, you can easily install it as shown.
# apt-get install -y hhvm
Installing HHVM will start it up now, but it not configured to auto start at next system boot. To set auto start at next boot use the following command.
# update-rc.d hhvm defaults

Step 4: Configuring Nginx/Apache to Talk to HHVM

7. Now, nginx/apache and HHVM are installed and running as independent, so we need to configure both web servers to talk to each other. The crucial part is that we have to tell nginx/apache to forward all PHP files to HHVM to execute.
If you are using Nginx, follow this instructions as explained..
By default, the nginx configuration lives under /etc/nginx/sites-available/default and these config looks in/usr/share/nginx/html for files to execute, but it don’t know what to do with PHP.
To make Nginx to talk with HHVM, we need to run the following include script that will configure nginx correctly by placing a hhvm.conf at the beginning of the nginx config as mentioned above.
This script makes the nginx to talk to any file that ends with .hh or .php and send it to HHVM via fastcgi.
# /usr/share/hhvm/install_fastcgi.sh
Configure Nginx for HHVM
Important: If you are using Apache, there isn’t any configuration is needed now.
8. Next, you need to use /usr/bin/hhvm to provide /usr/bin/php (php) by running this command below.
# /usr/bin/update-alternatives --install /usr/bin/php php /usr/bin/hhvm 60
After all the above steps are done, you can now start HHVM and test it.
# systemctl start hhvm

Step 5: Testing HHVM with Nginx/Apache

9. To verify that hhvm working, you need to create a hello.php file under nginx/apache document root directory.
# nano /usr/share/nginx/html/hello.php       [For Nginx]
OR
# nano /var/www/html/hello.php               [For Nginx and Apache]
Add the following snippet to this file.

and then navigate to the following URL and verify to see “hello world“.
http://localhost/info.php
OR
http://IP-Address/info.php
HHVM Page
HHVM Page
If “HHVM” page appears, then it means you’re all set!

Conclusion

These steps are very easy to follow and hope your find this tutorial useful and if you get any error during installation of any packages