http://www.techrepublic.com/blog/10-things/10-open-source-storage-solutions-that-might-be-perfect-for-your-company/
Showing posts with label UserAdministration. Show all posts
Showing posts with label UserAdministration. Show all posts
Monday, October 26, 2015
10 Linux GUI tools for sysadmins
http://www.techrepublic.com/blog/10-things/10-linux-gui-tools-for-sysadmins/
What are some good GUI tools that can simplify your Linux sysadmin tasks? Let's take a look at 10 of them.
1: MySQL Workbench
MySQL Workbench is one of my favorite tools for working with MySQL databases. You can work locally or remotely with this well designed GUI tool. But MySQL Workbench isn't just for managing previously created databases. It also helps you design, develop, and administer MySQL databases. A newer addition to the MySQL Workbench set of tools is the ability to easily migrate Microsoft SQL Server, Microsoft Access, Sybase ASE, PostgreSQL, and other RDBMS tables, objects, and data to MySQL. That alone makes MySQL Workbench worth using.2: phpMyAdmin
phpMyAdmin is another MySQL administration tool... only web based. Although it doesn't offer the bells and whistles of MySQL Workbench, it's a much more user-friendly tool. With phpMyAdmin you can create and manage MySQL databases via a standard web browser. This means you can install phpMyAdmin on a headless Linux server and connect to it through any browser that has access to the machine.3: Webmin
Webmin is a web-based one-stop-shop tool for administering Linux servers. With Webmin you can manage nearly every single aspect of a server—user accounts, Apache, DNS, file sharing, security, databases, and much more. And if what you need isn't included with the default installation, a massive number of third-party modules are available to take up the slack.4: YaST
YaST stands for Yet Another Setup Tool. It enables system configuration for enterprise-grade SUSE and openSUSE and serves as both the installation and configuration tool for the platform. With YaST you can configure hardware, network, and services and tune system security, all with an easy-to-use, attractive GUI. YaST is installed by default in all SUSE and openSUSE platforms.5: Shorewall
Shorewall is a GUI for configuring iptables. Yes, there are other GUIs for tuning the security of your system, but many of them don't go nearly as deep as Shorewall. Where an app like UFW is one of the best security tuners for the desktop, Shorewall is tops for the server. With this particular security GUI, you can configure gateways, VPNs, traffic controlling, blacklisting, and much more. If you're serious about your firewall, and you want a GUI for the job, Shorewall is what you want.6: Apache Directory
Apache Directory is about the only solid GUI tool for managing any LDAP server (though it is designed particularly for ApacheDS). It's an Eclipse RCP application and can serve as your LDAP browser, schema editor, ApacheDS configuration editor, LDIF editor, ACI editor, and more. The app also contains the latest ApacheDS, which means you can use it to create a DS server in no time.7: CUPS
CUPS is the Linux printer service that also happens to have a web-based GUI tool for the management of printers, printer classes, and print queues. It is also possible to enable Kerberos authentication and remote administration. One really nice thing about this GUI is its built-in help system. You can learn nearly everything you need to manage your print server.8: cPanel
cPanel is one of the finest web-based administration tools you'll use. It lets you configure sites, customers' sites and services, and quite a bit more. With this tool you can configure/manage mail, security, domains, apps, apps, files, databases, logs—the list goes on and on. The only drawback to using cPanel is that it's not free. Check out the pricing matrix to see if there's a plan to fit your needs.9: Zenmap
Zenmap is the official front end for the Nmap network scanner. With this tool, both beginners and advanced users can quickly and easily scan their network to troubleshoot issues. After scanning, you can even save the results to comb through them later. Although you won't use this tool to directly administer your system, it will become invaluable in the quest for discovering network-related issues.10: Cockpit
Cockpit was created by Red Hat to make server administration easier. With this web-based GUI you can tackle tasks like storage administration, journal inspection, starting/stopping services, and multiple server monitoring. Cockpit will run on Fedora Server, Arch Linux, CentOS Atomic, Fedora Atomic, and Red Hat Enterprise Linux.

Friday, October 23, 2015
How to find out files updated in last N minutes
Issue
How to find out files updated in last N minutes?
Resolution
It is simple. Use the following command:
Syntax:
find -cmin -N
where N is the number of minutes
Example:
find /suresh/home/songs/ -cmin -10
Tip:
If you would like to see path of the file's directory then use the ls command along with the above command:
find /suresh/home/songs/ -cmin -10 ls
How to find out files updated in last N minutes?
Resolution
It is simple. Use the following command:
Syntax:
find
where N is the number of minutes
Example:
find /suresh/home/songs/ -cmin -10
Tip:
If you would like to see path of the file's directory then use the ls command along with the above command:
find /suresh/home/songs/ -cmin -10 ls
Monday, August 31, 2015
Install APC (Alternative PHP Cache) in RHEL/CentOS 6/5 & Fedora 20-12
http://www.tecmint.com/install-apc-alternative-php-cache-in-rhel-centos-fedora/


APC (Alternate PHP Cache) is an free and open source cache for PHP code. The main goal of this module is to provide robust framework for caching and optimizing PHP code.

Install and Enable PHP APC in Linux
The instructions provided here shows how to install and enable APC caching for PHP on RHEL 6.5/6.4/6.3/6.2/6.1/6/5.8/5.6, CentOS 6.5/6.4/6.3/6.2/6.1/6/5.8/5.6 and Fedora 20,19,18,17,16,15,14,13,12using PECL command to download from the repositories.
Install Dependency Packages for APC
First, we need to install required packages called pecl, phpize and apxs commands, to install APC using YUMpackage manager tool.
Install APC Using PECL
Now we have all the needed packages to install APC. Here we use PECL command to install it. Please select default settings when asked.
Sample Output :
Enable APC PHP Extension
Run the following command to enable APC extension in Apache configuration.
Restart Apache Service for APC
Restart the Apache service to take new changes.
Verify APC Installation
Create a file phpinfo.php in Apache web root directory. For example /var/www/html/phpinfo.php.
Add the following code to it. save and close.
Open any browser and type the following URL. You will see APC enabled configuration similar to below.
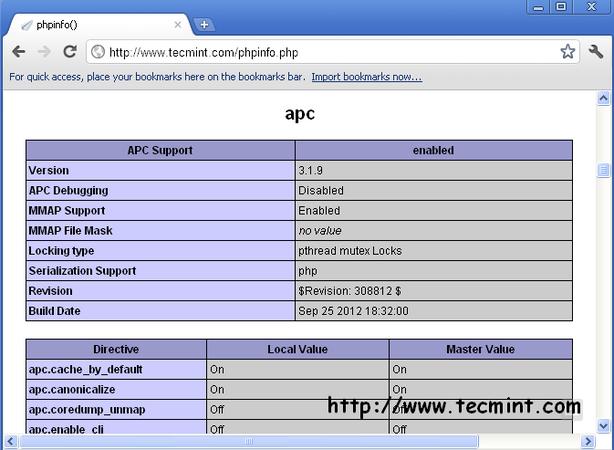
PHP APC Configuration Screen
Enable PHP APC administration
To enable APC administration panel, copy the following file.
Now open the file apc.php with VI editor.
Now set the username and password in the file apc.php as shown below.
Type the following URL in the browser. You will get administration panel of APC.
Some screenshots of APC Administration panel for your reference.
Vies Host Stats
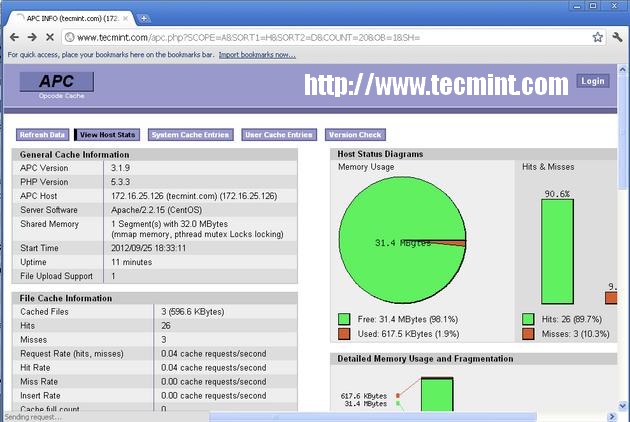
APC View Host Stats Overview
System Cache Entries
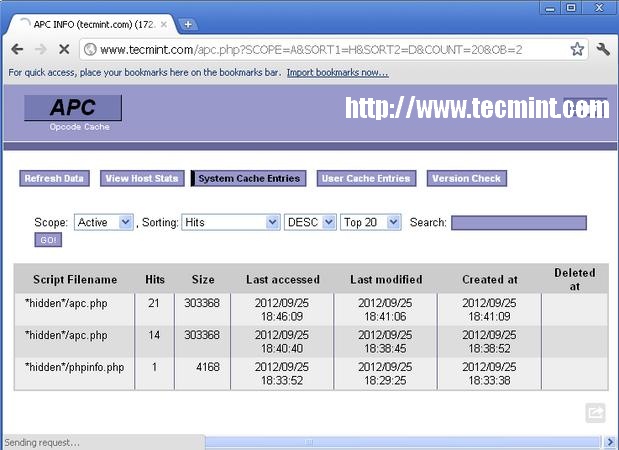
APC System Cache Entries Overview
User Cache Entries
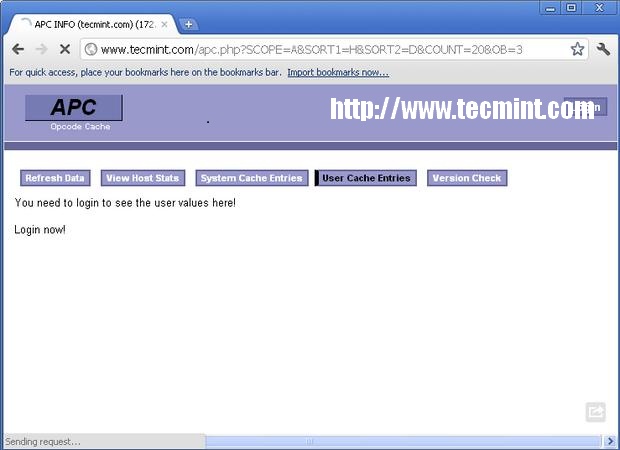
APC User Cache Entries Overview
APC Login Screen
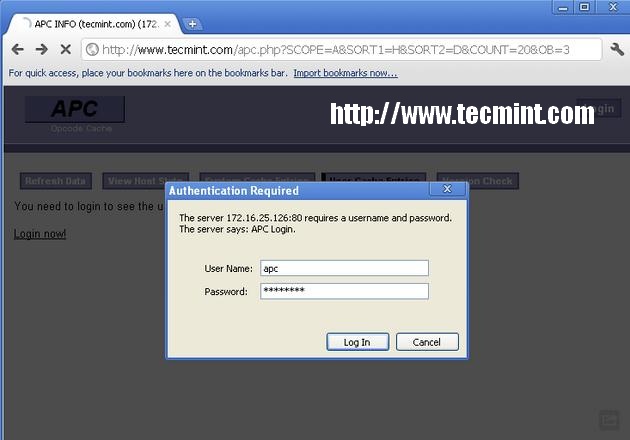
APC Admin Login Screen
APC Version Check
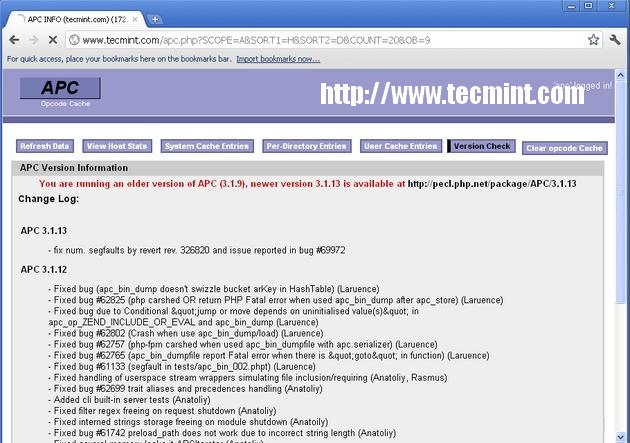
APC Version Check Overview
Upgrade APC using PECL
To upgrade, just execute following command it will download and upgrade APC.
Uninstall APC using PECL
If you like to remove it, then simple type the following command to uninstall APC completely from the system.
Setting Up High-Performance ‘HHVM’ and Nginx/Apache with MariaDB on Debian/Ubuntu
http://www.tecmint.com/install-hhvm-and-nginx-apache-with-mariadb-on-debian-ubuntu


HHVM stands for HipHop Virtual Machine, is an open source virtual machine created for running Hack (it’s a programming language for HHVM) and PHP written applications. HHVM uses a last minute compilation path to achieve remarkable performance while keeping the flexibility that PHP programmers are addicted to. Till date, HHVM has achieved over a 9x increase in http request throughput and more than 5x cut in memory utilization (when running on low system memory) for Facebook compared with the PHP engine + APC (Alternative PHP Cache).
HHVM can also be used along with a FastCGI-based web-server like Nginx or Apache.

Install HHVM, Nginx and Apache with MariaDB
In this tutorial we shall look at steps for setting up Nginx/Apache web server, MariaDB database server andHHVM. For this setup, we will use Ubuntu 15.04 (64-bit) as HHVM runs on 64-bit system only, although Debian and Linux Mint distributions are also supported.
Step 1: Installing Nginx and Apache Web Server
1. First do a system upgrade to update repository list with the help of following commands.

System Upgrade
2. As I said HHVM can be used with both Nginx and Apache web server. So, it’s your choice which web server you will going to use, but here we will show you both web servers installation and how to use them with HHVM.
Installing Nginx
In this step, we will install Nginx/Apache web server from the packages repository using following command.

Install Nginx Web Server
Installing Apache

Install Apache Web Server
At this point, you should be able to navigate to following URL and you will able to see Nginx or Apache default page.
Nginx Default Page

Nginx Welcome Page
Apache Default Page

Apache Default Page
Step 2: Install and Configure MariaDB
3. In this step, we will install MariaDB, as it providers better performance as compared to MySQL.

Install MariaDB Database
4. After MariaDB successful installation, you can start MariaDB and set root password to secure the database:
Answer the following questions by typing
y or n and press enter. Make sure you read the instructions carefully before answering the questions.
5. After setting root password for MariaDB, you can connect to MariaDB prompt with the new root password.
Step 3: Installation of HHVM
6. At this stage we shall install and configure HHVM. You need to add the HHVM repository to your
sources.list file and then you have to update your repository list using following series of commands.
Important: Don’t forget to replace DISTRIBUTION_VERSION with your Ubuntu distribution version (i.e. lucid, precise, or trusty.) and also on Debian replace with jessie or wheezy. On Linux Mint installation instructions are same, but petra is the only currently supported distribution.
After adding HHVM repository, you can easily install it as shown.
Installing HHVM will start it up now, but it not configured to auto start at next system boot. To set auto start at next boot use the following command.
Step 4: Configuring Nginx/Apache to Talk to HHVM
7. Now, nginx/apache and HHVM are installed and running as independent, so we need to configure both web servers to talk to each other. The crucial part is that we have to tell nginx/apache to forward all PHP files to HHVM to execute.
If you are using Nginx, follow this instructions as explained..
By default, the nginx configuration lives under /etc/nginx/sites-available/default and these config looks in/usr/share/nginx/html for files to execute, but it don’t know what to do with PHP.
To make Nginx to talk with HHVM, we need to run the following include script that will configure nginx correctly by placing a hhvm.conf at the beginning of the nginx config as mentioned above.
This script makes the nginx to talk to any file that ends with .hh or .php and send it to HHVM via fastcgi.

Configure Nginx for HHVM
Important: If you are using Apache, there isn’t any configuration is needed now.
8. Next, you need to use /usr/bin/hhvm to provide /usr/bin/php (php) by running this command below.
After all the above steps are done, you can now start HHVM and test it.
Step 5: Testing HHVM with Nginx/Apache
9. To verify that hhvm working, you need to create a hello.php file under nginx/apache document root directory.
Add the following snippet to this file.
and then navigate to the following URL and verify to see “hello world“.

HHVM Page
If “HHVM” page appears, then it means you’re all set!
Conclusion
These steps are very easy to follow and hope your find this tutorial useful and if you get any error during installation of any packages
Subscribe to:
Posts (Atom)