http://www.tecmint.com/glpi-it-asset-management-with-fusion-inventory-in-debian-linux/


Any type of business is bound to have innumerable amounts of items that need to be inventoried, tracked, and managed. Doing so by means of pen and paper not only takes excessive amounts of time but is often prone to multiple user errors. Moving to a digital system such as Excel/Libre Calc worksheets is a little bit more productive and easier to back up but does present some other interesting issues such as access to the spreadsheet, inability to easily query data, or the simple fact that multiple spreadsheets easily becomes a logistical nightmare!
GLPI is a fantastic piece of information-resource management software that can be installed to track company resources. GLPI is comparable in functionality to several commercial pieces of software such as LanSweeper,EasyVista,and ManageEngine. GLPI boasts several very useful features:
- Hardware/Software inventory
- Network and printing hardware inventory
- Support for Fusion Inventory and OCS Inventory
- Computer peripherals inventory such as monitors, scanners, telephones, etc
- Help-desk Ticketing System
- SLA Management
- Change Management
- Project Management
- Reporting to PDF, CSV, PNG, SVG, etc
When GLPI is paired with Fusion Inventory:
- Software deployment abilities
- Automated inventory through client agents
- Ability to do handle Android, Windows, Linux, BSD, HP-UX, and many other operating systems
All in all with GLPI and Fusion Inventory installed, the combination can be used to create an all encompassing help-desk/document management/inventory system for businesses of all sizes.
This tutorial will walk through the steps necessary to quickly setup, configure, and begin importing inventory into GLPI with the help of Fusion Inventory on Debian 8 Jessie, but the same instructions also works on Debian based systems like Ubuntu and Mint.
Necessary Components
- Debian 8 Jessie already installed ( TecMint has an article on installing Debian 8 here:
- Working network connection (necessary for the automatic inventory).
- A secondary machine to install the inventory agent (also with a network connection to the Debian server)
- Root/Administrator access to both machines
Installation of GLPI/Fusion Inventory Server
Step 1: Dependency Installation
1. The first step in the process is to boot up and prepare the Debian server. GLPI will require Apache2, MySQL, and some PHP additions in order to function properly. The easiest way to get these packages is with the Aptmeta-packager.
This command will download and install the necessary packages and start the basic server services. WhileMySQL is installing, it will likely ask to have the MySQL root password set. Set this password but DO NOT forget it as it will be needed soon.
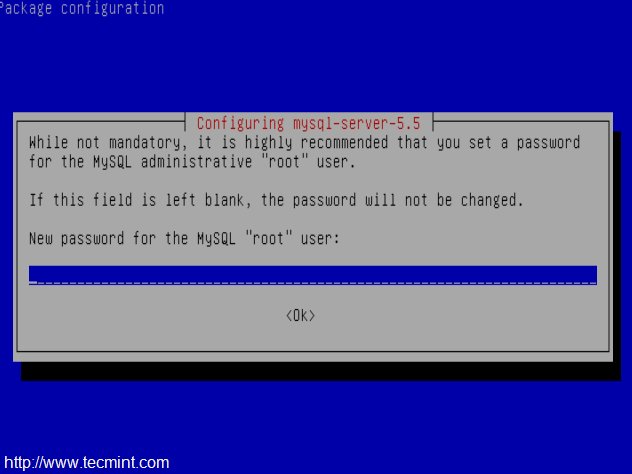
Set MySQL Root Password
2. After all of the packages finish installing, it is always a good idea to make sure that the server services are running. This is easily accomplished by evaluating the system to see what services are listening on what ports with the ‘lsof‘ utility.
Another way to confirm apache2 is working and delivering a web-page is to open a web browser and type the Debian server’s IP address in the URL bar. If Apache2 is working, the web browser should return the “default” Apache2 page.
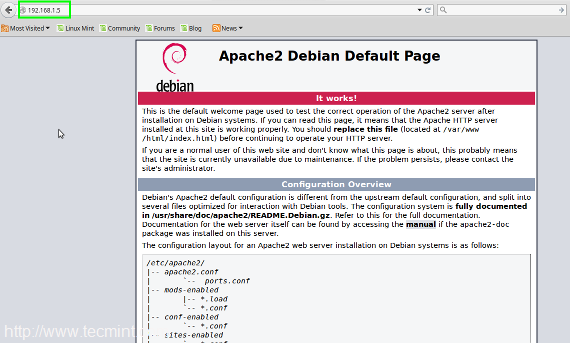
Apache Default Page
Now that Apache2 is at least serving up a web-page, lets first prepare the MySQL database and then configureApache2 to server GLPI.
Step 2: MySQL Configuration
3. From the Debian server, log into the MySQL command line interface using the ‘
mysql‘ command.
This command will attempt to log into MySQL as the MySQL root user (NOT the system root user). The ‘
-p‘ argument will prompt the user for the MySQL root user password that was configured when MySQL was installed in the prior paragraph. At this point, a new database ‘glpi‘ needs to be created for GLPI. The SQL command to do accomplish this task:
To confirm that this new database was indeed created, the ‘
show databases;‘ command can be issued. The result should look similar to the below screen-shot.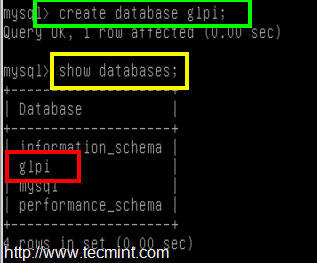
Show MySQL Databases
4. From here, a new user with privileges to this database should be created. It is never a good idea to use the root user! To create a new MySQL user and assign them permissions to the ‘
glpi‘ database:- create user ‘glpi’@’localhost'; → creates a MySQL user called ‘glpi‘.
- grant all privileges on glpi.* to ‘glpi’@’localhost’ identified by ‘some_password'; → this grants all database privileges on the database called ‘glpi‘ to the newly created user ‘glpi‘ and then assigns a password required for that user to access the SQL database.
- flush privileges; → run this for the new privileges to be read by the MySQL server.
At this point, MySQL is ready and it is time to obtain the GLPI software.
Step 3: Obtain and Prepare GLPI for Installation
5. Obtaining GLPI is very simple and can be accomplished one of two ways. The first method is to visit the project’s home page and Download GLPI Software or via the command line utility known as ‘wget‘.
This will download and install version 0.85.4 which is the current version as of this article.
6. Once the software is downloaded, the contents of the tarball need to be extracted. Using the tar utility, the contents can be decompressed, extracted, and placed in the proper location on the Debian server for the GLPI webpage to be accessible.
This will extract the tarball contents to a folder called ‘
glpi‘ in the /var/www directory. By default, this is the directory that Apache2 serves files on Debian.
7. The above tar command will extract all the contents into the ‘
/var/www/glpi‘ directory but it will all be owned by the root user. This will need to be changed for Apache2 and other security reasons using the chowncommand.
This will change the owner and primary group ownership for all of the files in
/var/www/glpi to www-datawhich is the user and group that Apache2 will be using.
At this point, Apache2 will need to be reconfigured in order to serve the newly extracted GLPI contents and the following section will detail the steps.
Step 4: Configuring Apache2 to serve GLPI
8. Apache2 in Debian systems is setup a little differently than other distributions. Some find it easier to manage and others find it more difficult.
This tutorial will keep things as simple as possible and will assume that GLPI is the only website being served by this Apache2 server and that it will be served on the traditional port 80 HTTP port.
This will allow for the least amount of modifications to the default Apache2 install and will allow users to get GLPI up and running quickly. Let’s begin!
The first thing to do is switch directories to the Apache2 configuration files directory. The configuration directory is ‘
/etc/apache2/sites-available‘ and the command:
9. The only items in this directory by default will be the two default Apache2 site configuration files. A new configuration file should be created for GLPI and can be created from the default in this directory using the copycommand.
This will copy the configuration of the default site into a new configuration file for GLPI.
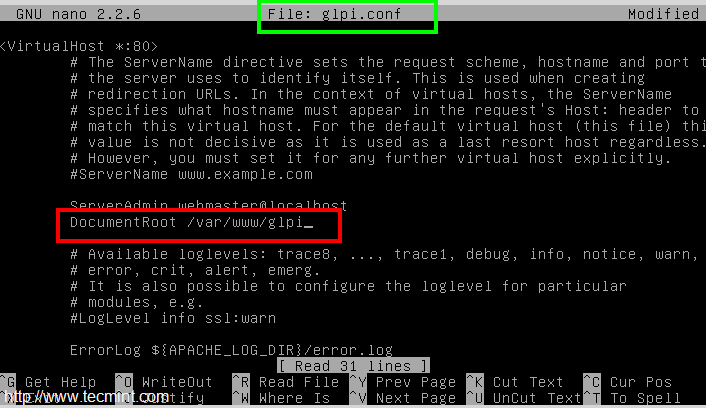
This new GLPI configuration file needs to be modified so that apache2 knows where the files to serve for GLPI reside. Open ‘
glpi.conf‘ with a text editor and proceed to configure as follows:- nano glpi.conf → open glpi.conf in the nano text editor.
- DocumentRoot /var/www/glpi → This tells Apache2 where the files for GLPI start. This line isn’t a command but rather something that is added to the glpi.conf file.
Configure Apache for GLPI
10. Apache2 has a TON of other options but for brevity’s sake, this change is the only change needed in this file. Now apache2 has to be made aware of the new GLPI site as well as told to stop serving the “default” page. This is easily accomplished with two tools a2ensite and a2dissite.
- a2dissite 000-default.conf → This will disable the default website Apache2 serves.
- a2ensite glpi.conf → This will enable the newly created GLPI website configuration.
- service apache2 reload → This will be necessary for Apache2 to stop/start serving the above changes.
At this point, Apache2 should be configured and serving the GLPI site information, the MySQL database is created and has an assigned user. The next step is to run the GLPI installer.
Step 5: Installing and Configuring GLPI
11. To start the installation of GLPI, simply visit the IP address of the server running Apache2. This can be done from the server itself if a graphical desktop environment has been installed; otherwise the other machine requested for this tutorial will be needed.
Upon visiting the IP address of the Apache2 server, the user will be presented with the GLPI installation page:
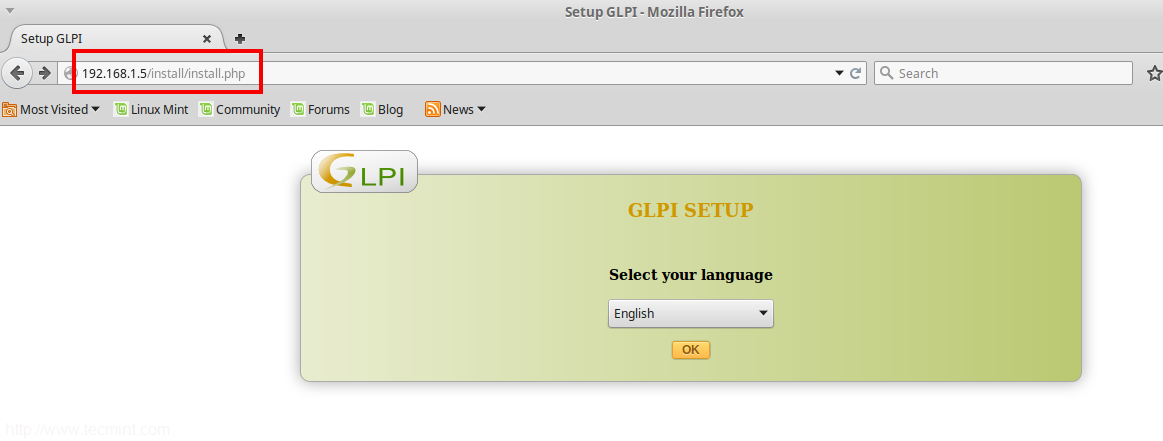
Select GLPI installation Language
12. At this point, select the appropriate language and click ‘OK‘. The next prompt will ask if this install is an upgrade or a fresh installation. This tutorial is assuming that this will be a fresh installation of GLPI.
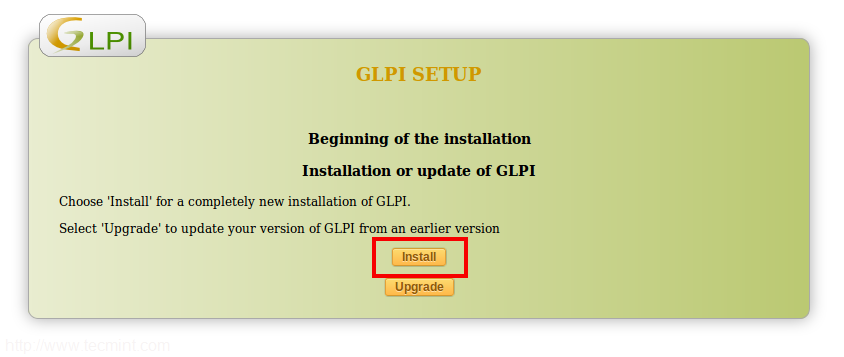
GLPI Installation
13. The next screen will be a quick dependency check by GLPI. Everything on this next page should come back with a green light. Anything with a red light should be addressed and corrected on the server.
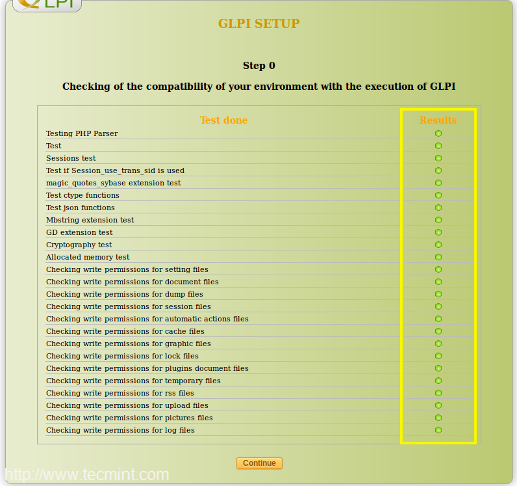
GLPI Dependency Checks
14. When all the lights are green, the next step is to inform the GLPI installer where the MySQL database is as well as the credentials to access the database. This information was determined earlier in this guide and should be as follows:
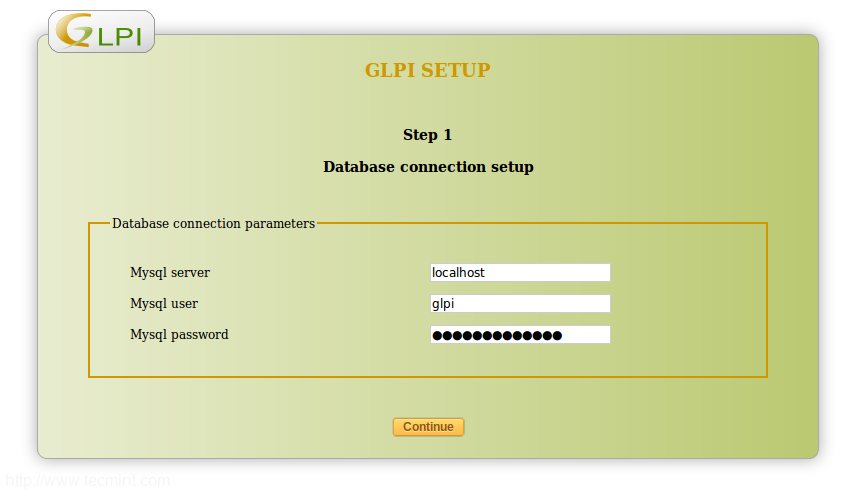
GLPI MySQL Database Settings
The server name of ‘localhost‘ can be used in this example due to the fact that this installer is running from the same server as the MySQL server.
Click continue after the three fields are filled in and the GLPI installer will run a SQL check to ensure that it can make contact with the SQL database. Since a database was already created earlier be sure to select that database in this step.
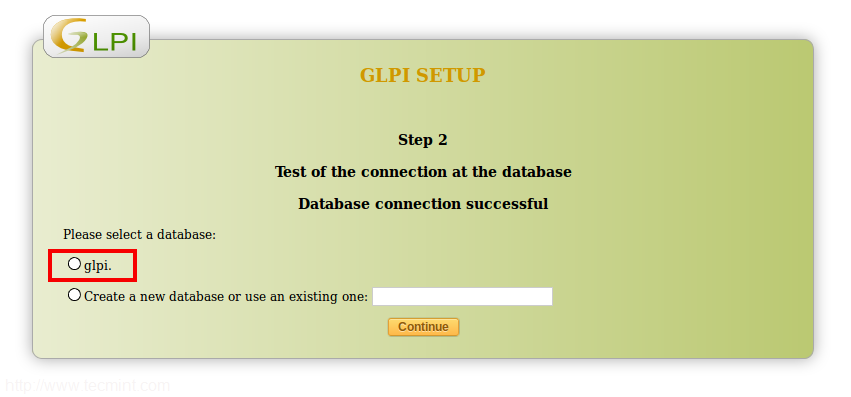
Select GLPI MySQL Database
15. This next step will take a couple of minutes depending on the speed of the MySQL server. The final page that the GLPI installer will show will be the default username/password page.
The only user account that will be needed for this guide will be the administrator account which defaults to username: ‘
glpi‘ and password: ‘glpi‘.
GLPI User Login Details
16. At this point, GLPI is ready for usage. Click the ‘Use GLPI‘ button to be taken to the login screen and log in as the administrator. Once logged in to GLPI, the GLPI landing screen will issue some warnings about the user-names above having the default passwords configured.
For now this can be ignored but should be changed when moving GLPI to production! The other warning will be a warning that recommends removing the installer file. This is easily accomplished by running the following ‘rm‘ command on the Debian server:
This concludes the installation of GLPI. At this point users can start adding inventory, creating tickets, creating a document library, and many other tasks. However, the rest of this guide will talk about how to setup the Fusion Inventory plug-in to further extend the capabilities of GLPI.
Step 6: Installation and Configuration of Fusion Inventory
17. Now that GLPI is up and running, it is time to add the Fusion Inventory plug-in. Heading back over to the Debian server, the Fusion Inventory plugin can be obtained with another simple wget command.
18. Now that Fusion Inventory has been downloaded, the contents of the tarball need to be extracted and then ownership changed in order for Apache2 to have access to the new plug-in on GLPI’s behalf:
This above chown command will change the ownership of all the files in the newly extracted folder. The ‘tar‘ command above must be run BEFORE this command!
19. Now all of the files are ready for GLPI to install the Fusion Inventory module. Head back over to the second computer (the one with the web browser) and log-in to GLPI.
At the top of the screen, there are several menu options for GLPI. One of these options will say ‘
Setup‘. Hover over this menu and wait for the drop down menu to appear and at the bottom will be a ‘plug-ins‘ option.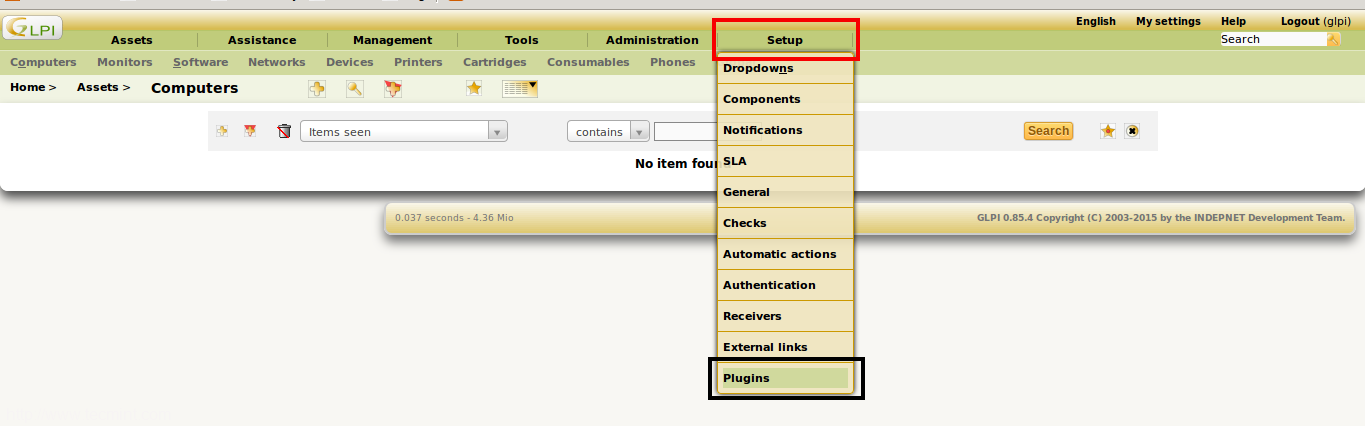
Install Fusion Inventory Plugin
20. The next screen will be the installed and ready to be installed list of plug-ins for GLPI. Assuming that Fusion Inventory was placed in the proper directory in the above paragraphs (
/var/www/glpi/plugins) this page will show the Fusion Inventory plug-in waiting to be installed.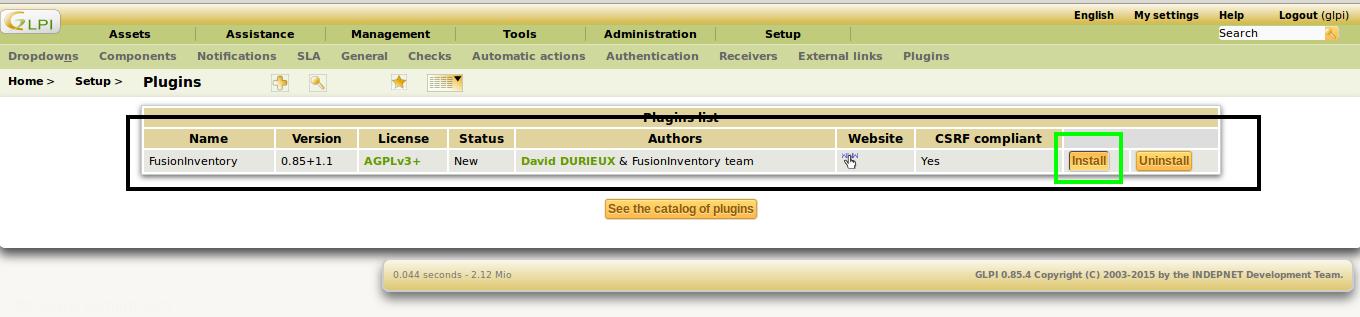
Fusion Plugin Install
21. Click the ‘
Install‘ button to install Fusion Inventory into GLPI. The page should refresh and then Fusion Inventory will need to be ‘enabled‘ which is done by clicking the newly visible ‘enable‘ button.
Notice that the ‘Status‘ field for Fusion will say ‘Installed / not activated‘ until the ‘Enable‘ button is selected!

Enable Fusion Inventory Plugin
22. Once the ‘Enable‘ button is selected, the Fusion Inventory plug-in will now be activated and ready for configuration.
In GLPI, a new ‘Plugins‘ menu will be visible and hovering over the menu will present a drop-down menu labeled ‘FusionInventory‘. Clicking on this option will likely present the following error screen since Fusion does not have a URL for agents to access the system configured yet.

Fusion Inventory Plugin Error
23. To fix this issue, hover over the ‘Administration‘ menu option. When the drop down menu appears, select the ‘Entities‘ dialog. When the page loads, select ‘Root Entity‘ and then on the left side of the webpage, select the ‘FusionInventory‘ selection.
This will allow for the service URL to be set. The service URL in this tutorial can simply be the server’s IP address however, if a functional DNS system (such as BIND9) is setup, an actual URL can be used here as long as the appropriate changes are made in the DNS system as well.
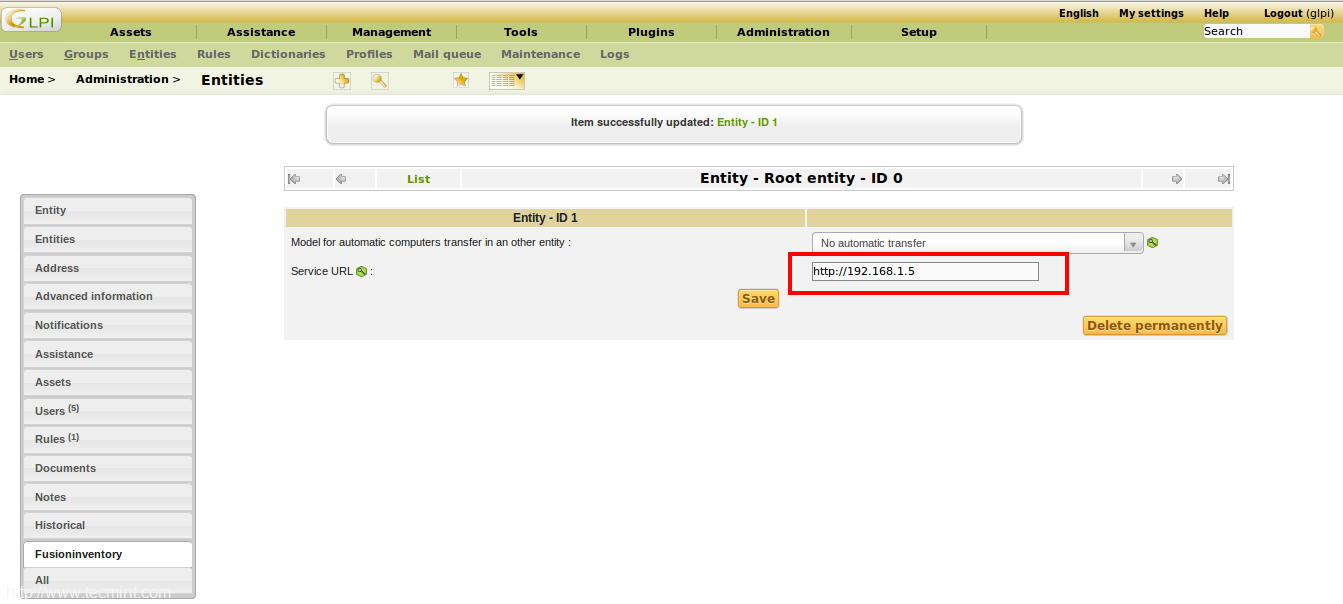
Set Fusion Service URL
Finally, GLPI and Fusion are ready to go. The next task is to start importing inventory into the system. This tutorial will continue with installing the Fusion Inventory Agent and confirming that the agent properly sends the inventory information to the server.
Step 7: Fusion Inventory Agent Installation
24. Now that all of the difficult stuff is out of the way, it is time to actually test the GLPI/Fusion Inventorysystem! Fusion has an agent for almost every operating system out there and all of them can be located on the following URL:
25. However, this tutorial will walk through configuring the agent on a Linux machine as the inventory agent is already in the repositories for most distributions.
The agent will be installed on a Linux Mint 17.1 machine in this example. This is a Debian/Ubuntu based distro and it uses the ‘apt‘ meta-packager to obtain packages from the repositories.
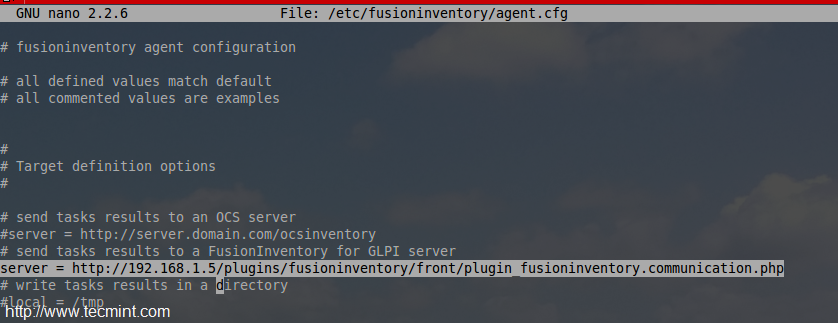
This will install all the necessary dependencies as well as the necessary configuration file for Fusion Inventory. It will be necessary to modify the configuration file in order to tell the agent where the Fusion server resides. The configuration file is located at ‘
/etc/fusioninventory/agent.cfg‘ and can be opened with any text editor.
Just to get a machine inventoried, there is only one line that needs to be changed in this particular file and that is the ‘
server =‘ line.
For this example the server line should be configured as follows (be sure to substitute the ip for the proper ip or hostname):
Add Fusion Server IP
Save the changes to this file and exit out of the text editor.
26. At this point as long as there is network connectivity to the Debian server, Fusion Inventory agent should be ready to inventory this Linux Mint machine. The command to run the agent is ‘
fusioninventory-agent‘.
After running this command there wont be much, if any, output. When the command line returns to the normal prompt, it is time to check GLPI/Fusion to see if the machine was inventoried.
There are a couple of places to see whether or not the inventory worked. The first place to look is the agents view in Fusion Inventory. This will show whether or not the client actually connected to the server. To get to this view click on the following menu options: Plugins → FusionInventory → Agent.
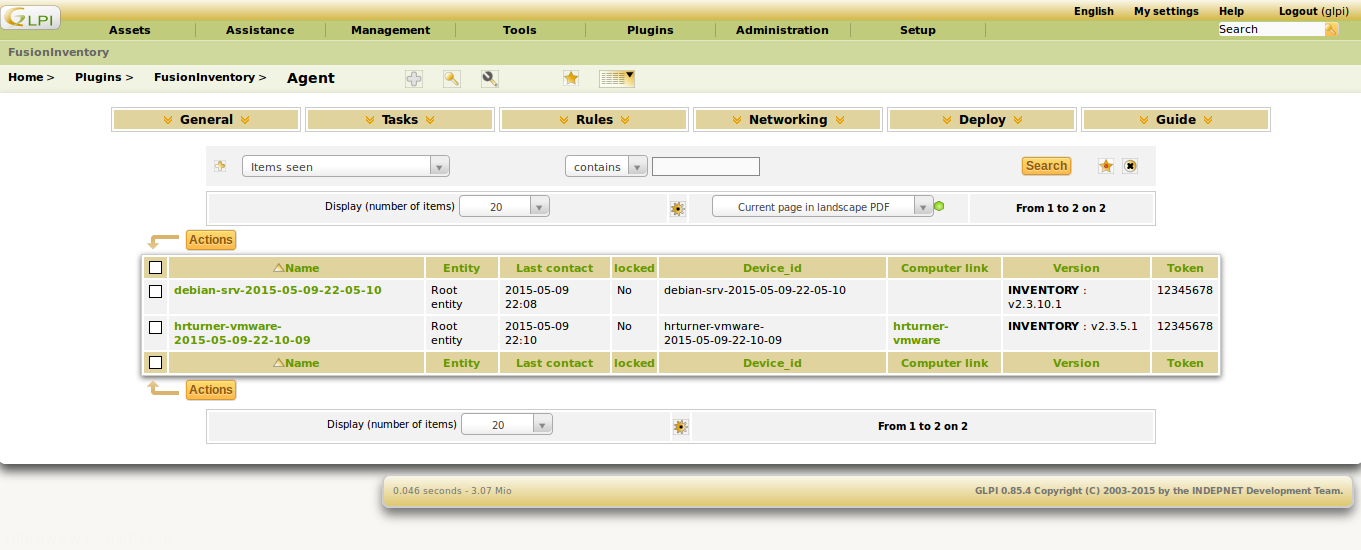
Fusion Agent View
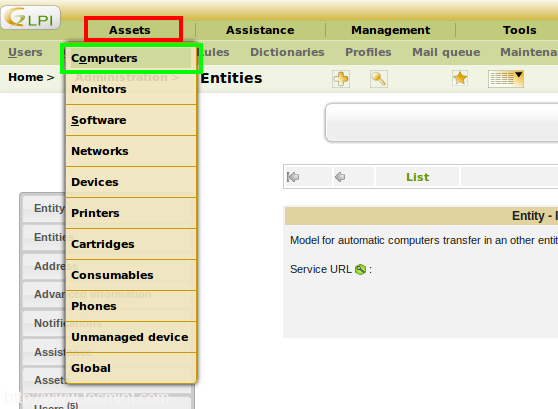
27. This screen shows that the Fusion Inventory agent successfully connected to the server from the test Linux Mint machine. The other place to check is within GLPI’s Assets menu; after all this is where the inventory of machines, software, and peripherals should reside! To access this menu, simply hover over ‘Assets‘ menu in the top left of the web browser and then select ‘computers‘ when the drop down menu appears.
Inventory View
This will bring up the main inventory page. The newly inventoried machine will be the only entity on this page for the time being but should be there never the less.
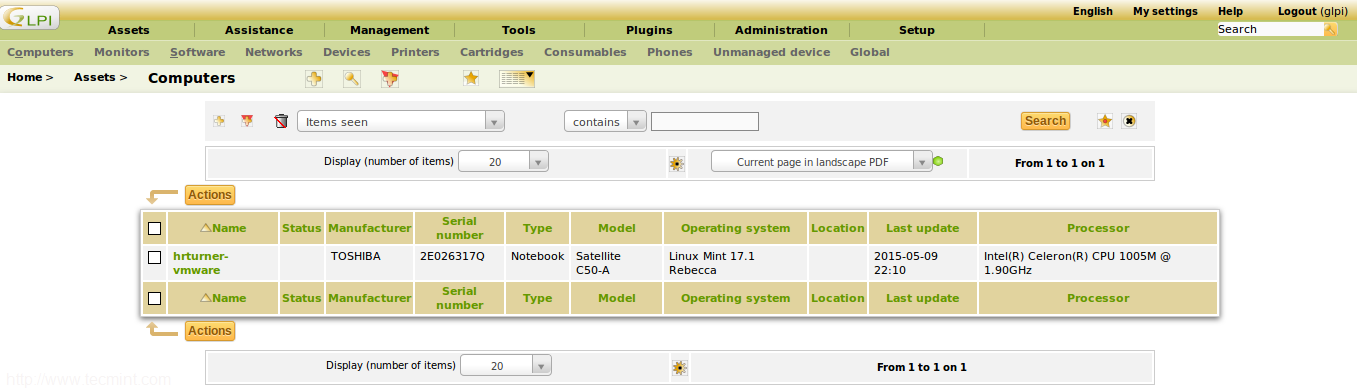
Newly Inventoried Machine
Success! There is the Linux Mint machine with a small amount of details about the machine. To view more complex details about this machine, simply click on the name of the machine in the column on the far left.
This will present a detailed view of this particular machine’s inventory. Everything from monitors, USB drives, scanners, and software will be displayed here and any information about those devices will also be available.

Detailed Inventory View
At this point, GLPI and Fusion are working harmoniously and should be ready for more agents to begin transmitting information from other machines! There are currently agents available for all the major operating systems available as well as source code for those who wish to compile from source.
Thank you for sticking through this rather lengthy tutorial and hopefully this tutorial has resulted in a workingGLPI/Fusion Inventory system. Please feel free to ask any questions and best of luck inventorying assets!
Resource Link: GLPI HomePage